Lab 2: Invoking WxCC APIs via Webex Connect & AI Agent
Lab Purpose
In Lab 1, you learned two ways to interact with WxCC APIs:
- Bruno — for direct, developer-style API calls.
- WxCC Flow Designer — using the HTTP Request node inline within the
BasicQueueFlow.
In Lab 2, you will explore a third pattern: invoking WxCC APIs from Webex Connect, triggered by a Webex AI Agent. This pattern lets the AI Agent collect customer details and call the WxCC Callback API during a live customer interaction.
The use case: A customer calls in via PSTN and reaches an AI Agent instead of a live agent. When the customer asks for a human, the AI Agent offers to schedule a callback instead of transferring the customer directly to a queue. If the customer accepts, the AI Agent collects the required details and schedules a callback through the WxCC Callback API.
Lab Objectives
The purpose of this lab is to demonstrate how an Autonomous AI Agent can orchestrate real WxCC API operations through Webex Connect fulfillment flows.
Key objectives include:
- App Integration: Create a Webex App Integration to authorize Webex Connect against WxCC APIs.
- Custom Node: Build a reusable Custom Node in Webex Connect that wraps the WxCC Callback API.
- AI Agent Import: Import a prebuilt Autonomous AI Agent with a callback-scheduling persona and slot filling.
- Fulfillment Flow: Build a Webex Connect Service Flow to fulfill the AI Agent's request and invoke the WxCC API.
- Voice Integration: Modify the BasicQueueFlow from Lab 1 to route inbound PSTN calls to the AI Agent.
- End-to-End Validation: Test the full workflow by calling in via PSTN.
Production vs. Lab Environment
In a real production environment, the AI Agent would typically check the current queue wait time before offering a callback, only suggesting one when the wait is genuinely long. We are skipping this step in our lab because wait times in a lab tenant are always near-zero, which would make the logic uninteresting to test. The AI Agent in this lab will offer a callback unconditionally when a human is requested.
Lab Overview
In this lab you will perform the following tasks:
- Create a Webex App Integration for Webex Connect.
- Build a reusable WxCC Custom Node in Webex Connect.
- Import the "Callback Assistant" Autonomous AI Agent.
- Build the Webex Connect fulfillment flow.
- Test the AI Agent in Preview.
- Modify the
BasicQueueFlowto route calls to the AI Agent. - Test the complete scenario end-to-end via PSTN.
Lab 2.1 - Create a Webex App Integration for Connect
In this first step, you will create the OAuth identity that allows Webex Connect to call WxCC APIs on behalf of your organization. Each external client (Bruno, Connect, custom apps) should have its own Integration so that scopes, tokens, and audit trails stay cleanly separated.
Instructions
- Navigate to the Webex for Developers website.
- Click Log In in the top-right corner and use the admin credentials provided for your POD.
- Once logged in, click your avatar in the top-right corner and select My Webex Apps.
- Click Create a New App.
- Click Create an Integration.
- Fill out the integration form with the following values:
- Integration Name:
Connect-WxCC Integration - Icon: Pick any icon.
- App Hub Description:
Allows Webex Connect to invoke WxCC Callback APIs. - Redirect URI(s):
https://ltrcct2009pod{XX}.us.webexconnect.io/callback - Scopes: Check the following four scopes:
cjp:config
cjp:config_read
cjp:config_write
cjp:user
- Integration Name:
- Click Add Integration at the bottom of the page.
- On the confirmation page, copy and save the Client ID and Client Secret somewhere safe. You will need them in Lab 2.2.
Warning
The Client Secret is shown only once. If you lose it, you'll need to regenerate it.
Why a separate Integration?
In Lab 1, you used a Webex Integration for Bruno. Each external client (Bruno, Connect, custom apps) should have its own Integration so that scopes, tokens, and audit trails stay cleanly separated.
Lab 2.2 - Build the WxCC Custom Node in Webex Connect
Webex Connect uses Custom Nodes to wrap REST APIs into reusable flow components. In this section, you will build one that wraps the WxCC scheduled callback API so it can be used in the fulfillment flow.
Create the Webex Connect Service
- Go to Control Hub → Contact Center → Overview and under Digital Channels launch [Webex Connect].
-
Create a new Service for this lab:
- Click on [Create New Service]
- Give it a name
WxCC API
-
From the menu on the left hand side, navigate to Assets > Integrations.
- Click Add Integration and select Custom Node.
Download the WxCC Custom Node Icon
Download the custom node icon before configuring the node: wxcc_custom.svg
If the SVG opens in the browser instead of downloading, right-click the link and save the file as wxcc_custom.svg.
-
Configure the new node:
Field Value Node Icon Upload the downloaded wxcc_custom.svgfileNode Name WxCC_APIDescription Schedules a callback in Webex Contact Center.Node Category WxCCCreation Type Create a blank integration -
Click [OK]. The new node opens so you can add the API method.
HTTP Connector configuration
Confirm the Queue-1 ID
The ScheduleCallback method uses the lab queue Queue-1. Each POD has its own Queue ID, so you must copy the value from your tenant before configuring the Custom Node method body.
- In Control Hub, go to Contact Center > Queues.
- Open Queue-1.
- Copy the ID shown under the queue name.
- Save this value temporarily. You will paste it into the
queueIdfield in the next section.
Warning
Do not use another attendee's Queue ID. The value is unique per POD.
Add the ScheduleCallback method
- Inside the WxCC_API node, click Add Method
-
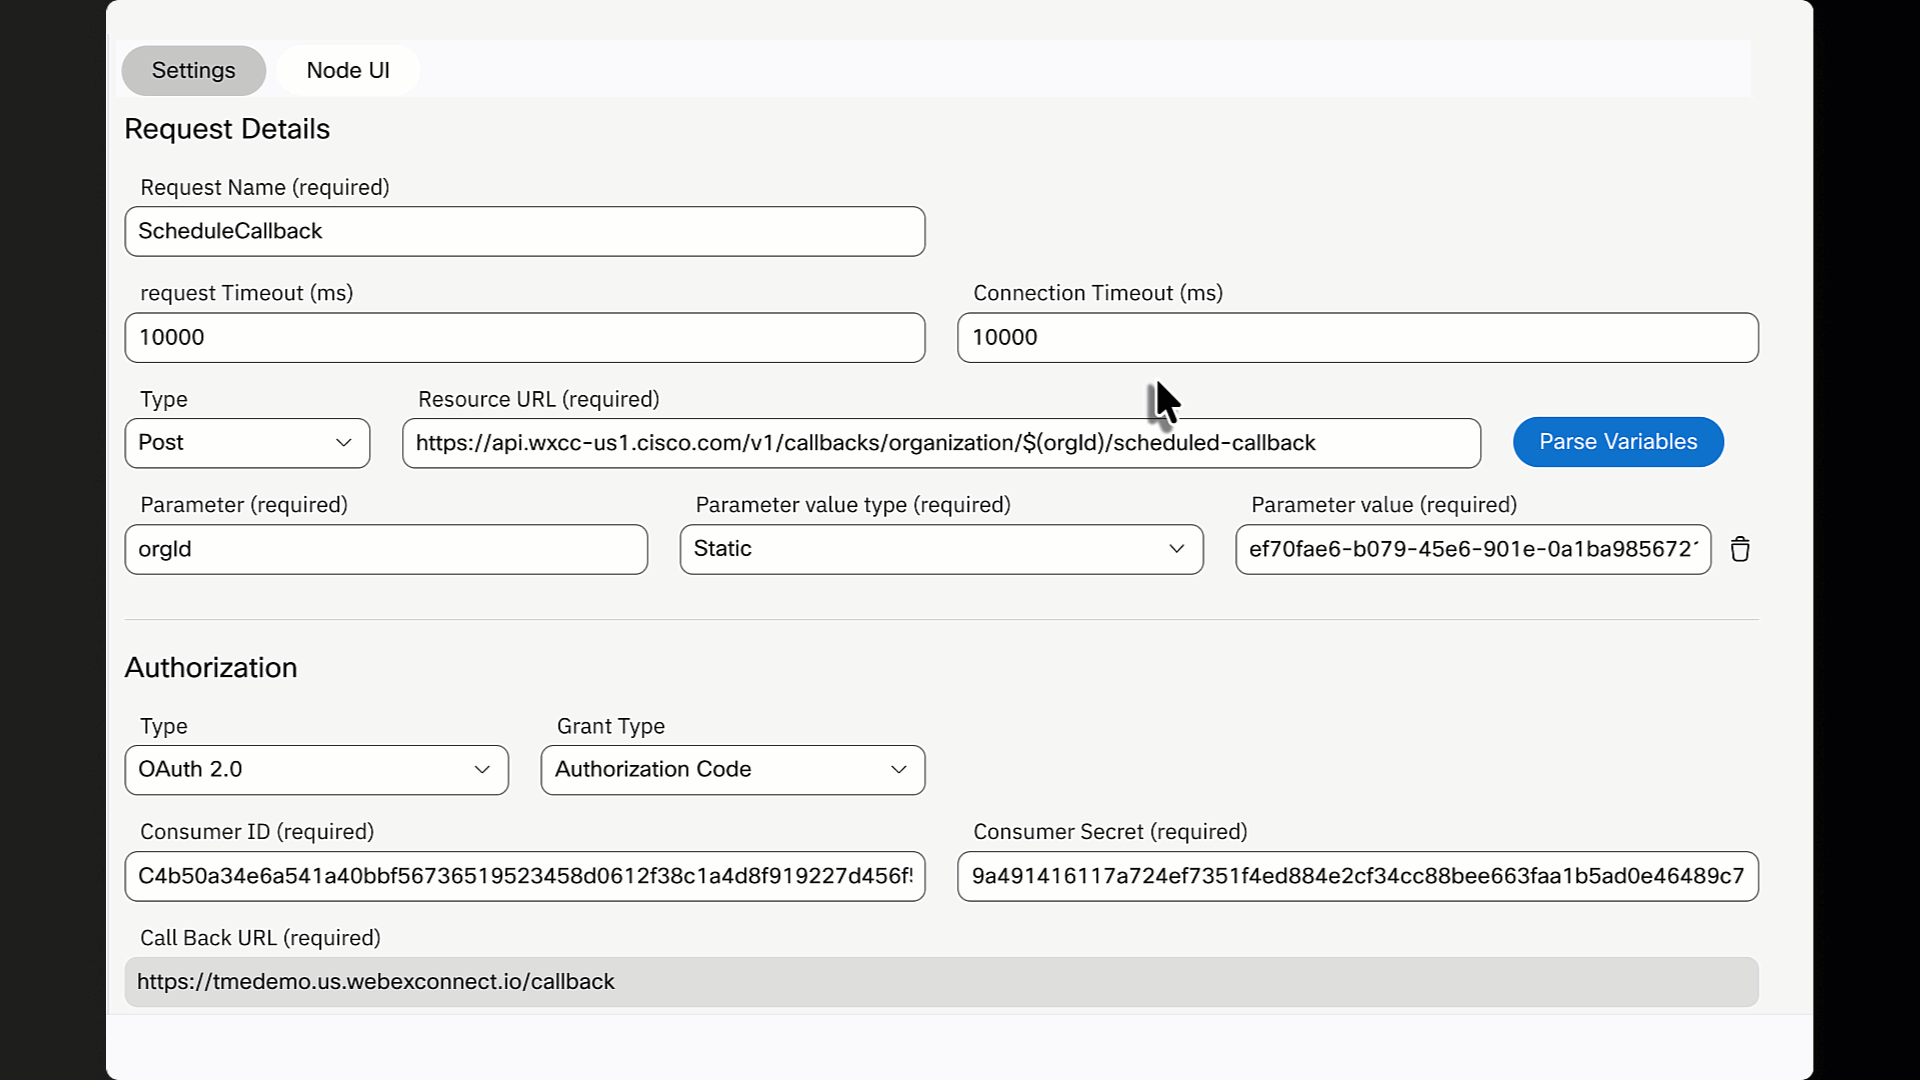
Configure the Request Details section:
Field Value Request Name ScheduleCallbackRequest Timeout (ms) 5000Connection Timeout (ms) 5000Type PostResource URL https://api.wxcc-us1.cisco.com/v1/callbacks/organization/$(orgId)/scheduled-callback -
Click Parse Variables (next to the Resource URL field). Add the following parameter:
Parameter Parameter Value Type Parameter Value orgIdStatic(paste your Organisation ID from your POD credentials) -
Configure the Authorization section:
Field Value Type OAuth 2.0Grant Type Authorization CodeConsumer ID (Client ID from the Webex Integration you created in Lab 2.1) Consumer Secret (Client Secret from the Webex Integration you created in Lab 2.1) Authorization URL https://webexapis.com/v1/authorizeScope cjp:config cjp:config_read cjp:config_write cjp:userAccess Token URL https://webexapis.com/v1/access_tokenValidity 1209599Refresh Token URL https://webexapis.com/v1/access_tokenClient Authentication Send client credentials in body -
Under Advance Settings, confirm the following are set:
Field Value Access Token URL Method POSTAccess Token URL Parameter type BodyAccess Token URL Parameters — Name grant_typeAccess Token URL Parameters — Value authorization_code -
Click Get Access Token. A Webex login window will appear — sign in using your POD admin credentials. Accept the requested permissions. Your Access Token and Refresh Token will populate automatically.
-
Configure the Headers section:
Parameter Parameter Value Type Parameter Value Content-TypeStaticapplication/json -
Configure the Body section. Set the content type to
JSON (application/json)and paste in the following:{ "customerName": "$(name)", "callbackNumber": "$(callback_number)", "timezone": "America/New_York", "scheduleDate": "$(date)", "startTime": "$(start_time)", "endTime": "$(end_time)", "queueId": "REPLACE_WITH_QUEUE_1_ID", "callbackReason": "$(reason)" } -
Click Parse (inside the Body section). Configure the six dynamic input parameters:
Parameter Parameter Value Type Field Name nameDynamicNamecallback_numberDynamicCallback NumberdateDynamicDatestart_timeDynamicStart Timeend_timeDynamicEnd TimereasonDynamicReason -
Configure the Response section. Under Configure Node Events, confirm the following is set:
Node Event Body Response Path Condition Value Node Edge SuccessHTTP Status(blank) starts with2SuccessFailureHTTP Status(blank) starts with4ErrorFailureHTTP Status(blank) starts with5Error -
Under Set data to be returned in a flow session, add the following response parameter:
Parameter Name Body Response Path response_bodyBody$ -
Click [Save].
Scheduled Callback Method
Test the Custom Node
- Inside the WxCC_API node, click [Test].
- Select the ScheduleCallback method.
-
Enter sample values:
Field Example NameJane SmithCallback Number5554443322DateToday's date in YYYY-MM-DDformatStart TimeA time at least 30 minutes in the future, HH:mm:ssEnd TimeA time at least 30 minutes after start time, HH:mm:ssReasonCustomer requested a scheduled callback from the AI Agent. -
Click [Test] and confirm a successful
2xxresponse.
Checkpoint
You now have a reusable Webex Connect Custom Node that can schedule callbacks in WxCC. Lab 2.4 will call this node from the AI Agent fulfillment flow.
Troubleshooting
- 401 / 403: Re-authorize the Custom Node and confirm the Lab 2.1 Integration includes
cjp:config,cjp:config_read,cjp:config_write, andcjp:user. - 400 - Invalid request: Confirm
date,start_time, andend_timeuse the expected formats and that the start time is at least 30 minutes in the future. - Invalid queue: Confirm the
queueIdmatchesQueue-1in your POD.
Lab 2.3 - Import the "Callback Assistant" AI Agent
In this section, you will import the prebuilt Callback Assistant AI Agent. The imported agent already contains the persona, instructions, and the schedule_callback fulfillment action used later in this lab.
Download the Callback Assistant Import File
Download the AI Agent import file: Callback Assistant.json
If the JSON opens in the browser instead of downloading, right-click the link and save the file as Callback Assistant.json.
Import the AI Agent
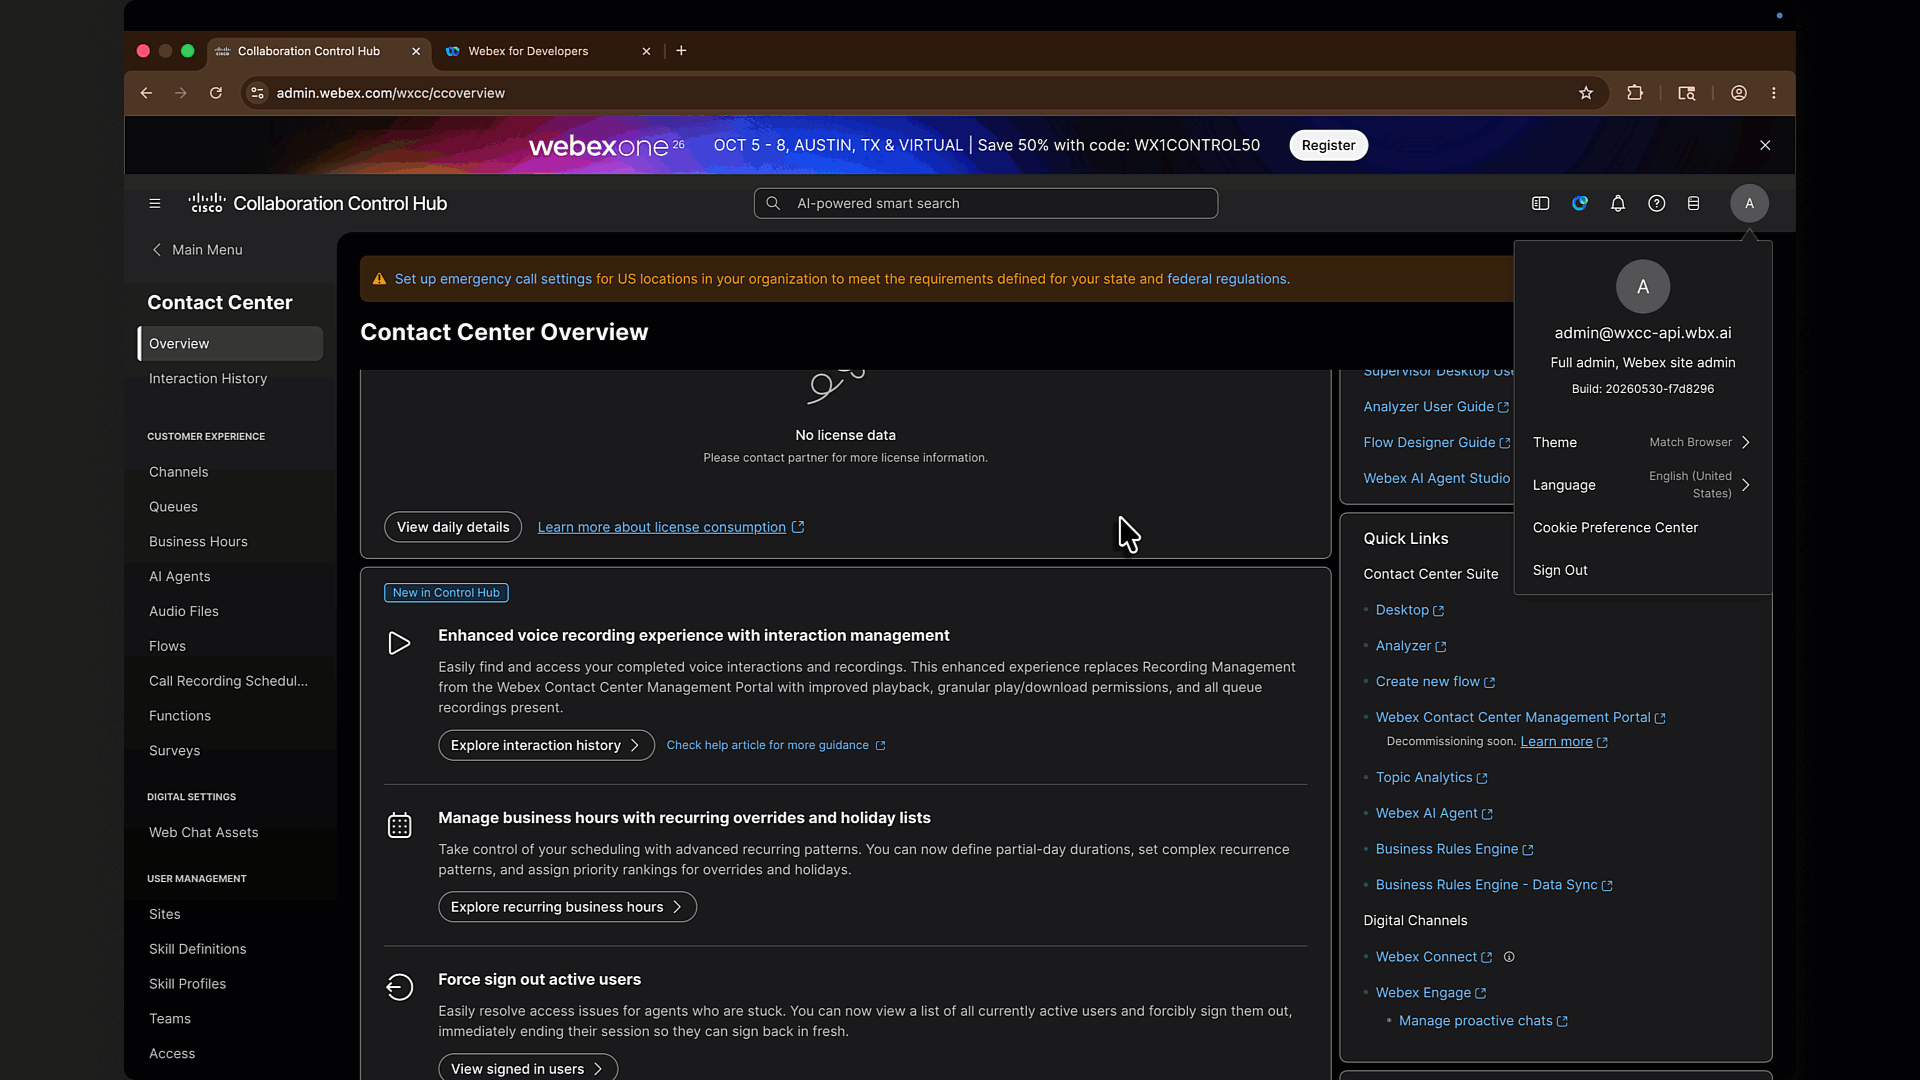
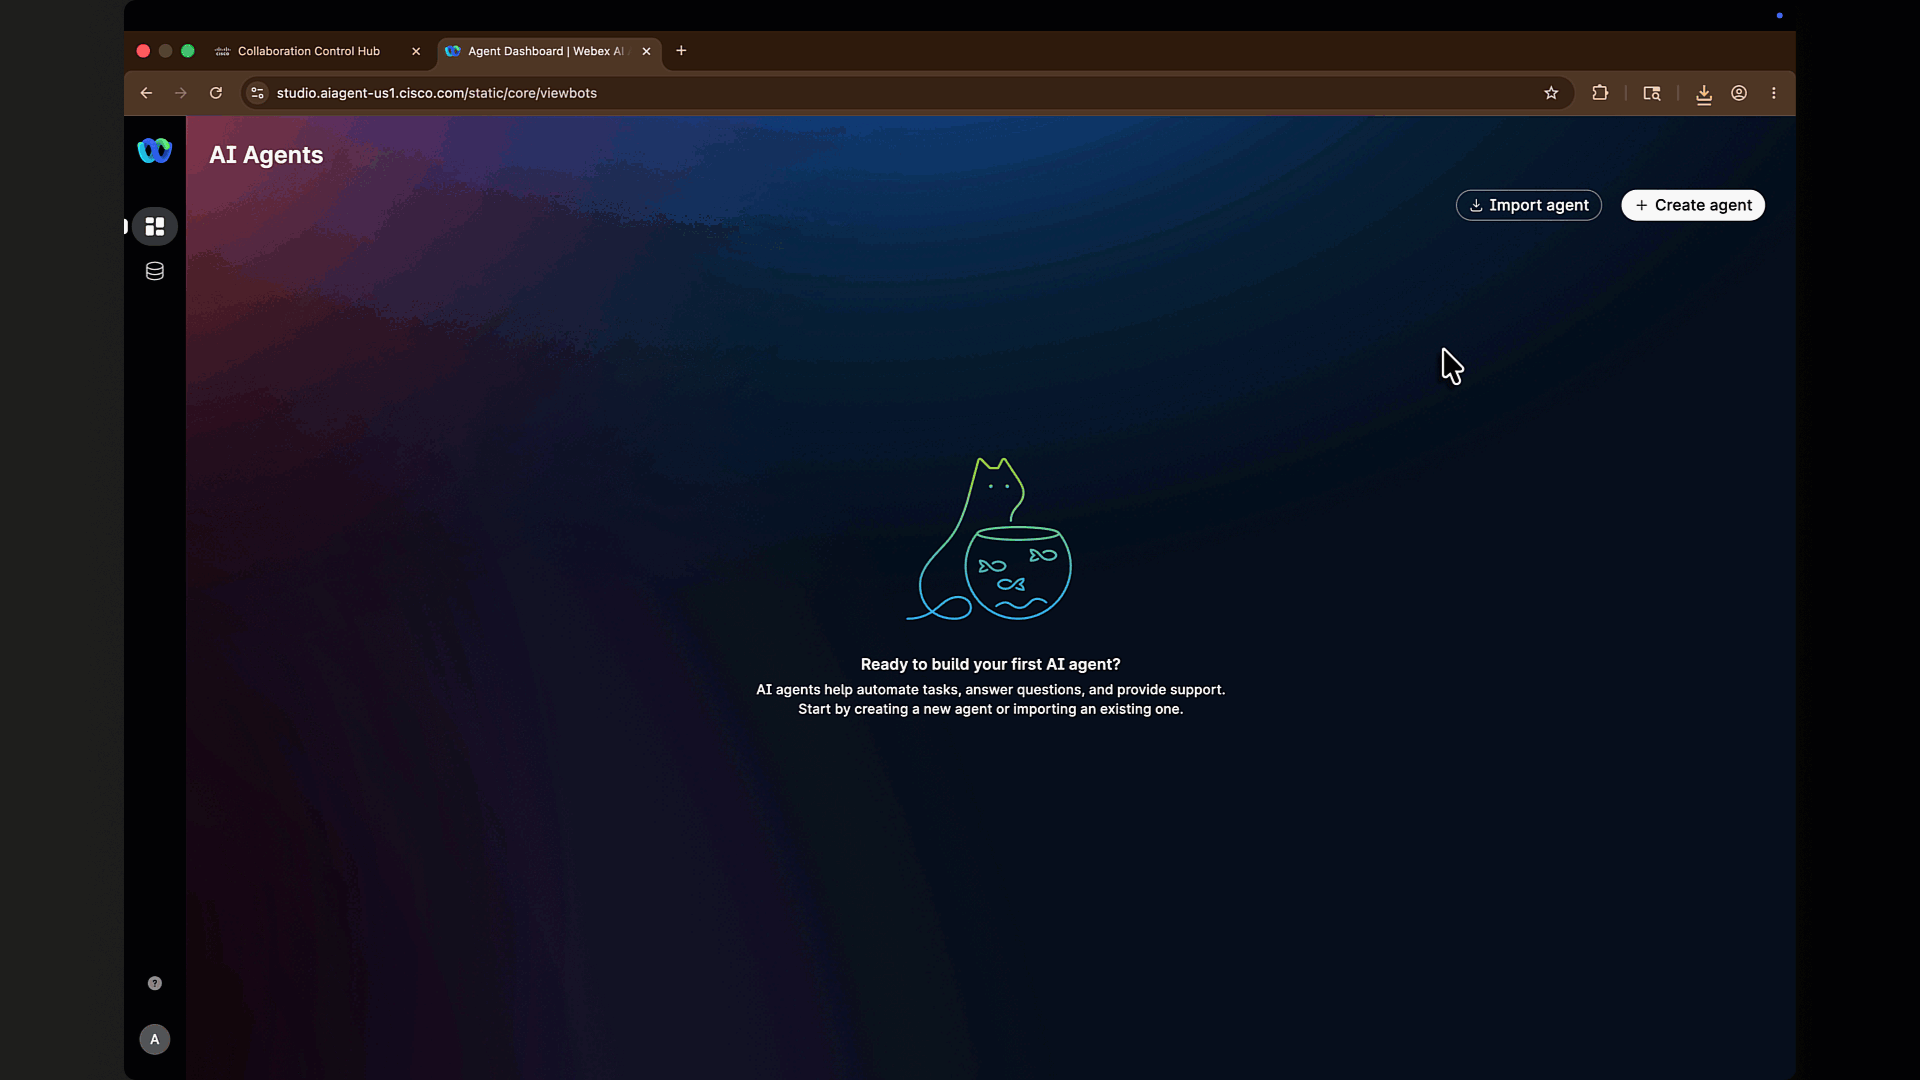
- From Control Hub, navigate to Contact Center and under Quick Links click Webex AI Agent. The Webex AI Agent Studio opens in a new window.
- Click Import agent.
- Upload the downloaded
Callback Assistant.jsonfile. - Complete the import workflow and open the imported Callback Assistant agent.
- Confirm the agent is not published yet. You will publish it after the fulfillment flow is connected and tested.
Review the Imported Agent
- Open the imported Callback Assistant agent.
-
Confirm the Welcome message is configured:
Thanks for calling Webex Contact Center! How can I help you today? -
Open the Actions tab and confirm the
schedule_callbackaction exists. -
Confirm the action has the following input entities:
Entity Name Required Purpose nameYes Customer name for the scheduled callback mobile_numberYes Callback phone number collected by the AI Agent dateYes Callback date requested by the caller start_timeYes Callback window start time requested by the caller end_timeYes Callback window end time requested by the caller reasonNo Optional callback reason
Warning
Do not publish the AI Agent yet. The imported action still needs to be connected to the Webex Connect fulfillment flow you will build in Lab 2.4.
Import AI Agent
Lab 2.4 - Build the Webex Connect Fulfillment Flow
When the AI Agent triggers schedule_callback, Webex Connect needs a flow to receive the collected callback details, normalize the callback phone number, and invoke the WxCC API via the Custom Node we built in Lab 2.2. In this section you will build that flow.
Action fulfillment flow in Webex Connect
- Go to your WxCC API Service in Webex Connect.
-
Click on [Flows] to create your fulfillment flow.
- Click on [Create Flow]
- Give your flow a name
schedule_callback - Select New Flow under Method
- Select Start from Scratch
- Click on [Create]
-
Configure the Start Node to trigger the flow from the AI Agent:
- Select the AI Agent Event.
-
Set the SAMPLE JSON to the below:
{
    "start_time": "",
    "end_time": "",
    "date": "",
    "mobile_number": "",
    "name": "",
    "reason": ""
}
Info
The variable names in the JSON sample must match the corresponding input entities in the imported AI Agent action:
name,mobile_number,date,start_time,end_time, andreason.Note
This sample JSON is used to parse variables in Flow Builder. The values can stay empty because the AI Agent supplies the real values at runtime.
-
Click on [Parse]
- Click on [Save]
Info
Flows do not autosave, so make sure you save your flow whenever you make edits.
-
Add an Evaluate node to normalize the phone number before sending it to WxCC.
The AI Agent may collect the phone number with
+, spaces, parentheses, or hyphens. The WxCC API expects the callback number without formatting characters, so this node creates a cleaned variable namedphone_Number.- Drag and drop an Evaluate node onto the canvas next to the Start Node.
- Connect the green outlet of the Start Node to the Evaluate node.
- Double-click the Evaluate node.
-
Paste the following JavaScript into the code editor:
var phone_Number = "$(n2.aiAgent.mobile_number)".replace(/\+/g, "") .replace(/ /g, "") .replace(/\(/g, "") .replace(/\)/g, "") .replace(/\-/g, ""); 1; -
Set the Script Output value to
1. - Set the Branch Name value to
Success. - Click [Save].
- Save the flow.
Warning
The
n2prefix refers to the Start Node ID and may be different in your flow. Pickmobile_numberfrom the Input Variables panel if your node ID is different. -
Now we'll invoke the WxCC Callback API using the Custom Node we built in Lab 2.2.
- Drag and drop the WxCC_API node onto the canvas next to the Evaluate node.
- Connect the green outlet of the Evaluate node to the WxCC_API node.
- Double-click on the node.
- Set Method Name to
ScheduleCallback -
Map the inputs as follows:
Custom Node Input Mapped Value name$(n2.aiAgent.name)callback_number$(n5.phone_Number)date$(n2.aiAgent.date)start_time$(n2.aiAgent.start_time)end_time$(n2.aiAgent.end_time)reason$(n2.aiAgent.reason)Warning
The
n2andn5prefixes refer to node IDs and may be different in your flow. Pick the variables from the Input Variables right panel rather than typing them manually. The callback number should come from thephone_Numbervariable created by the Evaluate node. -
Click on [Save].
- Save the flow.
-
To complete the flow, click on the green outlet at the right of the Custom Node and drag it to the canvas. Release it to open the End dialogue:
- Set the Node Event value to
onSuccess. - Set the Flow Result value to
101 - Successfully completed flow [Success]. - Click on [Save].
- Open the Transition Actions (Optional) tab for the End node.
-
Click + Add Action and configure the action:
Field Value Time On-enterAction Set variableVariable resultValue Callback Scheduled -
Save the flow.
- Set the Node Event value to
-
To finish your fulfillment flow, you need to pass the output variables back to the AI Agent. This is done through the Flow Outcomes.
Info
The AI Agent is notified of flow completion. By default, the notification for AI Agent is enabled under the flow setting with the default payload. On flow completion, you can update the payload shared with the AI Agent using the Flow Outcomes.
- Click on the button at the top right of the flow editor.
- Click on the Flow Outcomes tab.
- Open the Last Execution Status Outcome.
- Confirm Notify AI Agent is selected.
- Select Enter key and value.
-
Click on + Add New for each variable below. Pick the values from the Input Variables right panel under the appropriate node section:
Key Value transactionID$(transid)flowname$(flowname)serviceName$(serviceName)statuscode1000result$(result)response$(n3.response_body)Note the numbering for your variables might be different. Make sure
responsecorresponds to the response body from your WxCC_API node. -
Click on [Save].
- Save the flow.
Your schedule_callback flow is now completed.
Before leaving the flow editor, make sure you [Make Live] the flow, otherwise it will not be visible to the AI Agent Studio.
Link the flow back to the AI Agent action
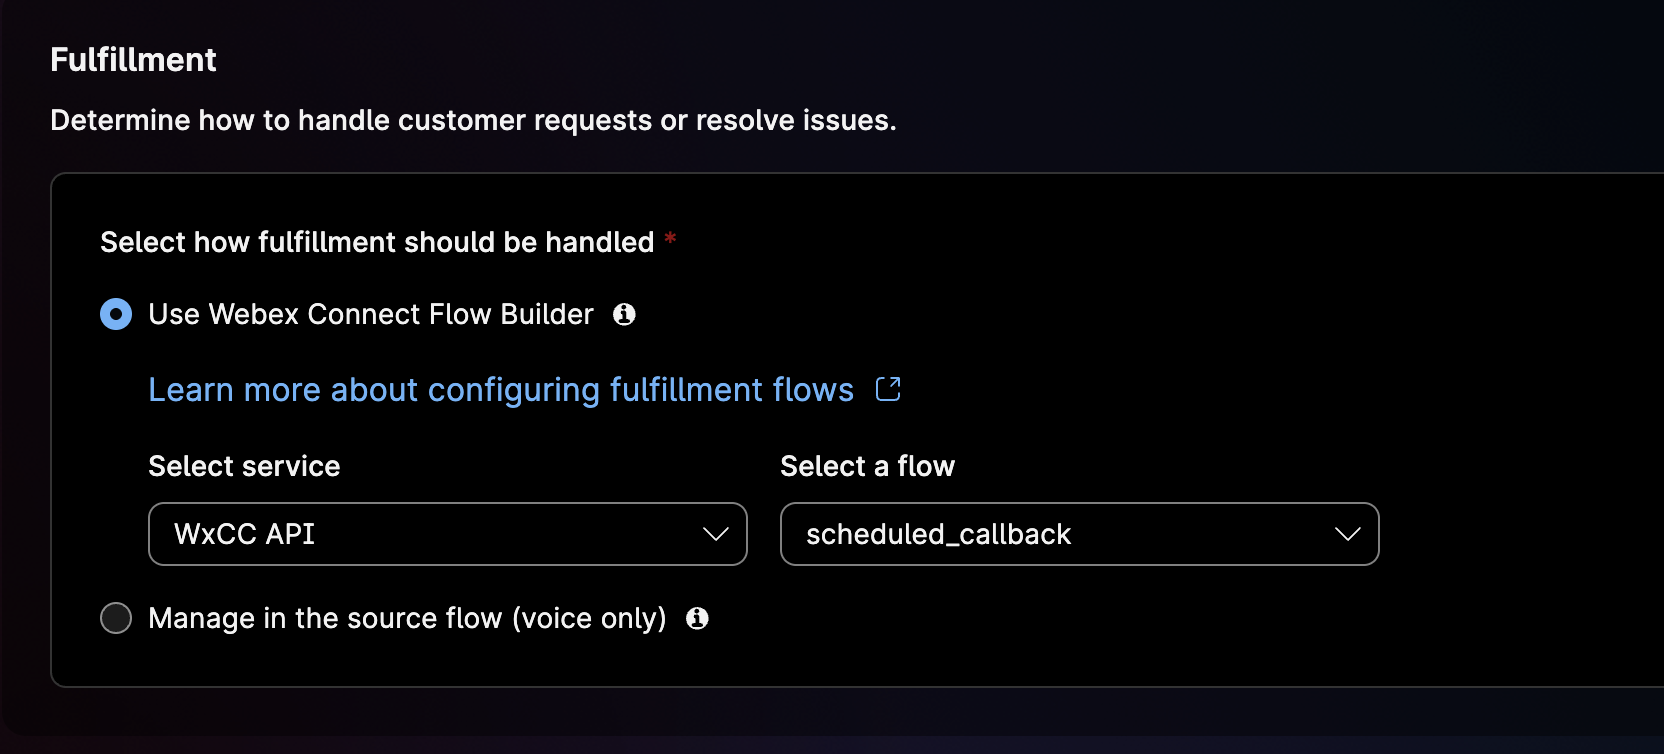
- Return to AI Agent Studio → open your
Callback Assistantagent → Actions tab → openschedule_callback. - Under the Fulfillment section:
- Use Webex Connect Flow Builder should already be selected.
- Service: WxCC API
- Flow: select the freshly published schedule_callback flow.
- Click [Save]
Link Flow to Action
Lab 2.5 - Test the AI Agent
Before going live with PSTN, validate that the Callback Assistant follows the programmed logic by using the Preview tool in the AI Agent Studio.
- In the AI Agent Studio, click the [Preview] button at the top-right of the configuration page.
- You can do a preview chat or a preview voice conversation. Initiate a session.
-
Verification checklist — confirm the Agent successfully executes the following logic:
- Greeting: Does it warmly greet you and ask how it can help?
- Intent Detection: When you say "I'd like to talk to a real person", does it offer a callback?
- Slot Filling: Does it collect your name, phone number, callback date, and callback time window naturally?
- Confirmation: Does it read the details back before scheduling?
- Fulfillment: Does it execute
schedule_callbackand read back the confirmed date and start time?
Troubleshooting your AI Agent
The Sessions option in the left navigation panel of your AI Agent configuration window provides a comprehensive record of all interactions between the AI agent and users. To view session details, click on an individual row in the sessions table. If the session is locked, click the [Decrypt content] button to view the data.
Warning
The [Decrypt content] button appears only if you have decrypt access within the AI Agent Studio. If you do not have access, ask your administrator to grant you decryption privileges.
To debug the Webex Connect flow, use the Flow Debugging tool. Before debugging:
- Click the at the top-right of the flow editor next to Save.
- On the Flow Settings screen enable Descriptive Logs in the General tab.
- Then in the flow designer, click the Bug icon on the far-right navigation pane to open the debug panel.
- Click Decrypt Logs above the search bar, then select an execution to inspect the per-node data flow.
PUBLISH YOUR AI AGENT
Once you have validated your AI Agent in Preview, you can Publish it.
- In the AI Agent configuration page, click [Publish] at the top-right corner.
- Provide a publishing comment in the next dialogue and click Publish.
Your Agent is now operational and ready to be wired into the voice flow.
Lab 2.6 - Connect the AI Agent to the Inbound Call
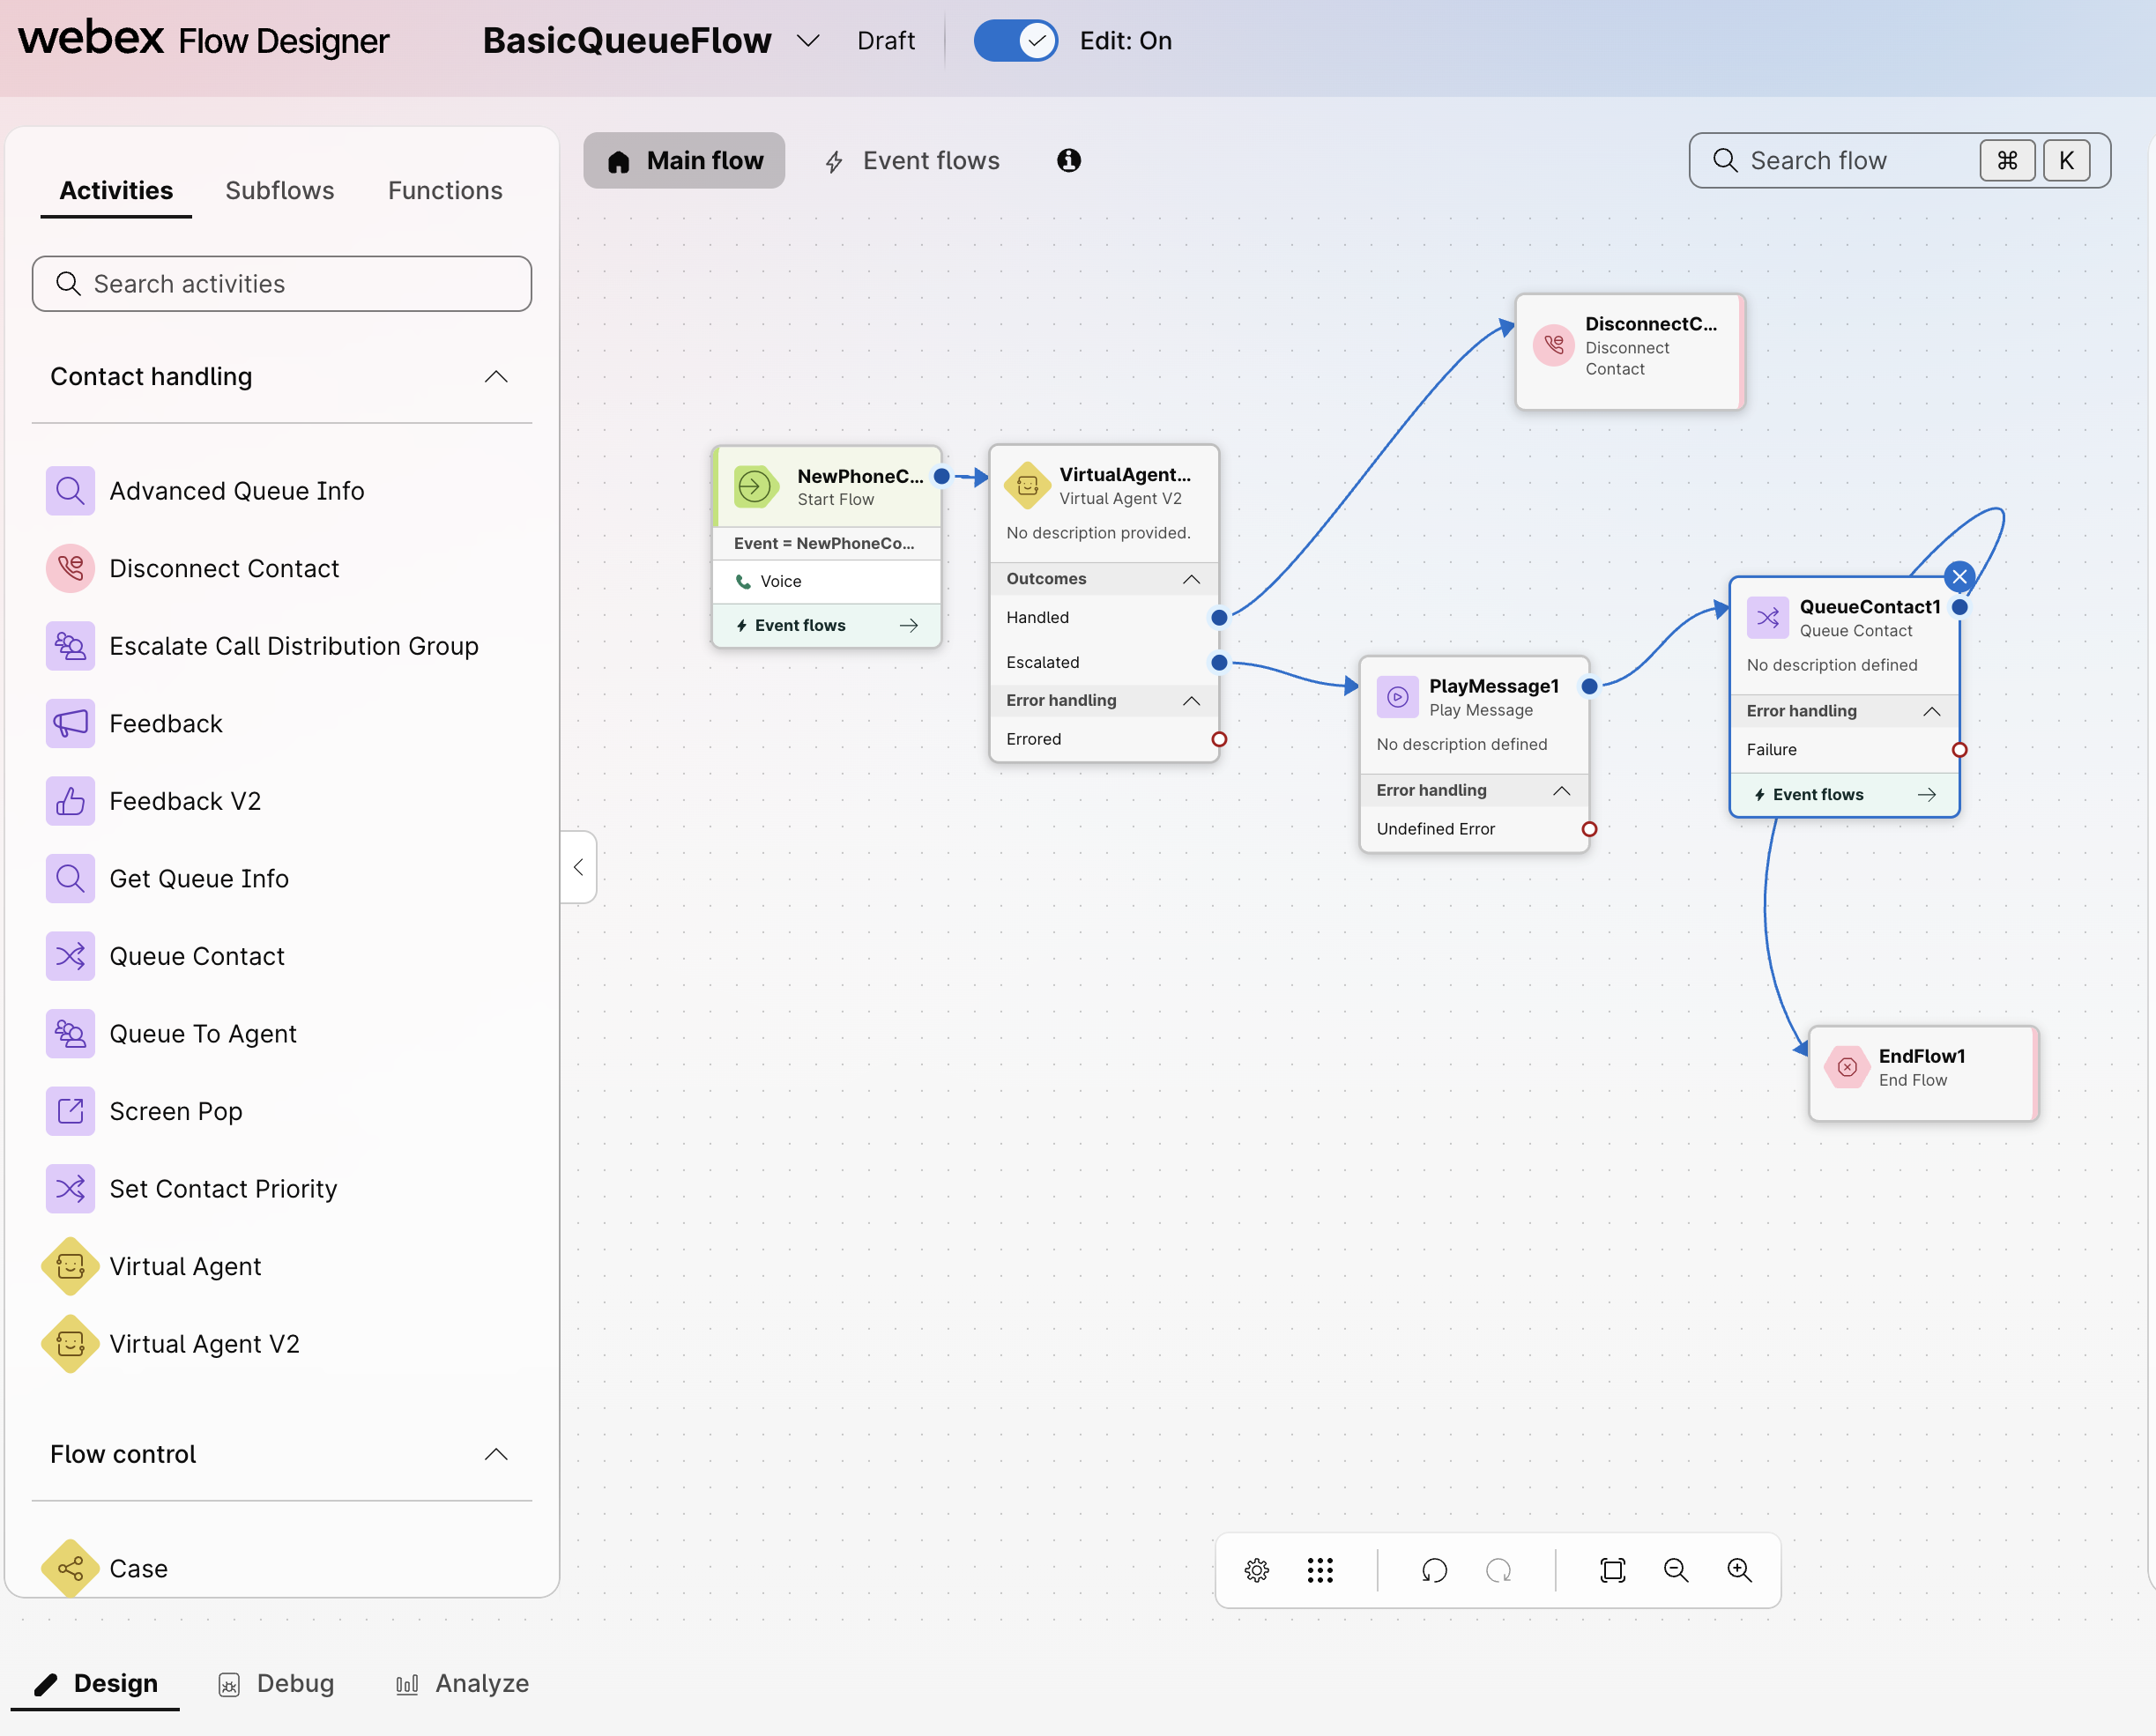
In this configuration step, you will modify the BasicQueueFlow from Lab 1 so inbound PSTN calls hit the AI Agent first. If the AI Agent successfully schedules a callback, the call ends. If the AI Agent escalates, the call falls back to the original queue path.
Delivering the inbound call to the Callback Assistant
- Go to Control Hub → Contact Center → Flows.
- Open your flow BasicQueueFlow. Enable the Edit slider at the top of the canvas.
-
Locate the starting call path:
NewPhoneContact → PlayMessage1 → QueueContact1 → EndFlow1 -
From the Activities Library drag and drop a Virtual Agent V2 to the right of the NewPhoneContact event.
Note the event may appear as NewContact in your flow.
-
Insert the Virtual Agent V2 node between NewPhoneContact and the existing PlayMessage1 node:
- Remove the connector from NewPhoneContact to PlayMessage1.
- Connect NewPhoneContact to Virtual Agent V2.
- Keep the existing PlayMessage1 → QueueContact1 → EndFlow1 path in place.
-
Click on the Virtual Agent V2 node and configure the settings below in the Activity Settings panel on the right side of the canvas:
- Click the pencil on the Activity Label and rename it to
AIAgent_Greeter - Provide an Activity Description.
- Under Conversational Experience, set Static Contact Center AI Config.
- Then in the Contact Center AI Config dropdown, select Webex AI Agent (Autonomous).
- In the Virtual Agent drop-down menu, select your imported AI Agent (
Callback Assistant). - In the Decryption Settings, set the Enable decryption slider to ease troubleshooting during debugging. Make sure the Enable decryption slider is also set in the Global Flow Properties panel.
- Click the pencil on the Activity Label and rename it to
-
Wire up the output branches:
- Handled branch → connect to Disconnect Contact (the AI Agent successfully scheduled the callback, so the call can end).
- Escalated branch → connect to PlayMessage1 so the customer can still reach the original queue path.
- Leave PlayMessage1 connected to QueueContact1.
- Leave QueueContact1 connected to EndFlow1.
Your final flow should be:
NewPhoneContact → Virtual Agent V2 Virtual Agent V2 / Handled → Disconnect Contact Virtual Agent V2 / Escalated → PlayMessage1 → QueueContact1 → EndFlow1 -
Enable the Validation check with the slider in the bottom right of the editor. If there are no errors, click [Publish Flow].
Flow with AI Agent
No need to update the Routing Strategy
Because we modified BasicQueueFlow in place, your existing Routing Strategy from Lab 1 already points to it — no further changes are needed.
Lab 2.7 - Test the complete scenario
You can now test the complete scenario end-to-end via PSTN.
- Dial your POD's PSTN number (provided by the instructor).
-
Walk through this dialogue:
You (Caller) Expected AI Agent Response (silence — agent greets first) "Thanks for calling Webex Contact Center! How can I help you today?" "I'd like to talk to a real person" "All our agents are currently helping other customers, but I'd be happy to schedule a callback for you. Can I get your full name?" "Jane Smith" "Thanks Jane. What's the best phone number to call you back on?" "919-555-1234" "What date would you like the callback?" "Tomorrow" "What time window works best for you?" "Between 3:30 PM and 4:30 PM Eastern" "Just to confirm — Jane Smith at 919-555-1234, tomorrow between 3:30 PM and 4:30 PM. Should I go ahead and schedule the callback?" "Yes" (triggers fulfillment) "You're all set, Jane! We'll call you back tomorrow at 3:30 PM. Have a great day!" -
Verify the callback was created in WxCC from Bruno.
Open Bruno and run the scheduled callbacks
GETrequest:GET /v1/callbacks/organization/{orgId}/scheduled-callbackConfirm your newly scheduled callback appears in the response payload.
Warning
As the room environment may be noisy, please avoid using speaker mode for your calls to avoid unintended responses.
Full-Circle Moment
The same GET API you tested in Bruno during Lab 1 now returns a callback that was created end-to-end by an AI Agent talking to you over PSTN and orchestrated by Webex Connect. That's the power of API-driven contact center architecture.
Lab Completion ✅
You've now seen three different ways to invoke WxCC APIs:
| Method | Lab | Best For |
|---|---|---|
| Bruno | Lab 1 | Developer testing, ad-hoc calls |
| WxCC Flow Designer (HTTP Request) | Lab 1 | Inline API calls within voice/digital flows |
| Webex Connect + AI Agent | Lab 2 | Conversational AI automation with reusable Custom Nodes |
At this point, you have built a fully automated Callback Scheduling experience that:
- [x] Uses a dedicated Webex Integration to securely authorize Webex Connect against WxCC APIs.
- [x] Wraps the WxCC Callback API in a reusable Custom Node.
- [x] Greets inbound PSTN callers with an Autonomous AI Agent.
- [x] Collects customer details via slot filling and triggers a Webex Connect fulfillment flow.
- [x] Schedules a real callback in WxCC and confirms it back to the caller.
- [x] Falls back gracefully to the live queue when the AI cannot handle the call.
Congratulations! You have successfully completed Lab 2 and are now ready to move on to the next Lab.